Nest of Posies

the blog

Navigation
  • Home
  • About Me
  • delish
  • crafty whims
  • our home
  • kids family
  • fall
You are here: Home / our home / Wood Burning Insert Fireplace Makeover

Wood Burning Insert Fireplace Makeover

November 13, 2014 by Kellie

This post is sponsored by “Your Big Finish” a giveaway & campaign from Black+Decker

There’s no question with the disclaimer up there that this is a sponsored post.  However, I positively love that Black+Decker is actually wanting to start a movement to get unfinished projects done in your home!!!  Such as paint, crown modeling, shelves – you name it.

I like that they’re giving us a “shove” to get finished especially right before the holidays.

They’re even offering fabulous prizes!  Like $10,000 + weekly prizes.  H E L L O ! ! !

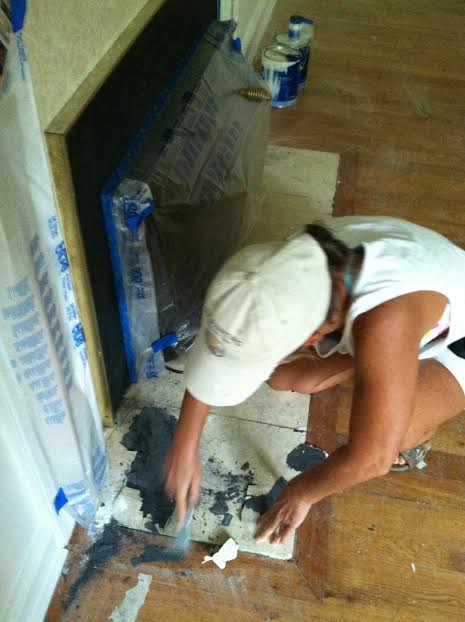
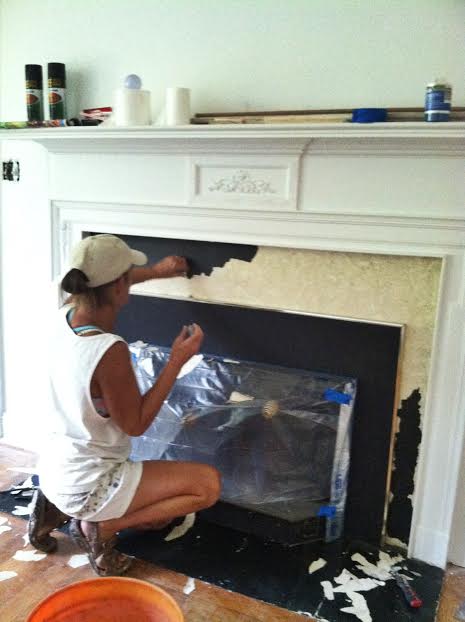
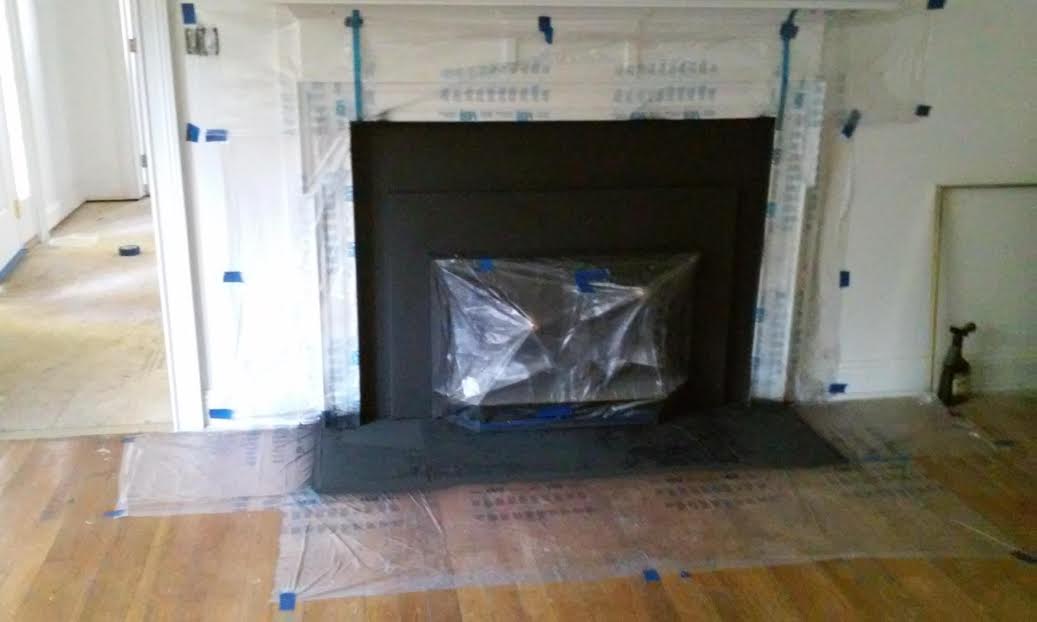
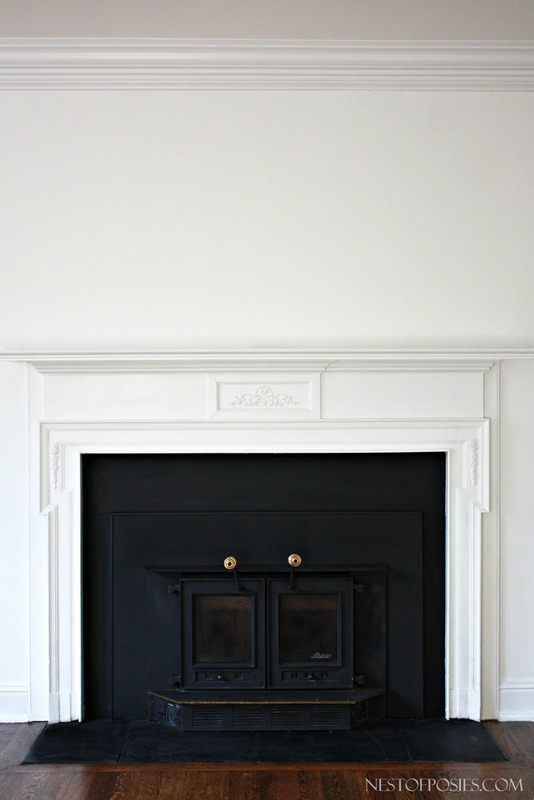
So truth be told, this post is actually part 1 of a 3 part series.  Just to refresh your memories, we bought a foreclosure (finally) back in August.  The house has 2 fireplaces.  This post is about our Wood Burning Insert Fireplace Makeover and I will have another post about our gas log fireplace, coming soon.   I had never seen a fireplace set up like this before, with a wood burning insert.  I grew up with an open wood burning fireplace.  But I knew I kinda liked it from the get go.  It was different but had great potential.

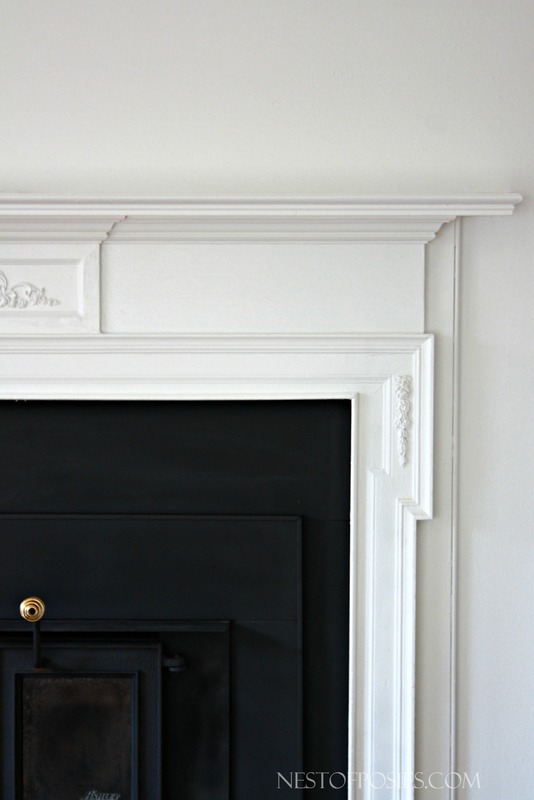
When we were “looking” at the house before we purchased it, all I could think about was that mantel!!!  It was gorgeous.  Even surrounded by the yellow hues of the walls & the golden yellow stain color on the floors.  I knew I could fix all of that.  So it truly was love at first sight.  But I’m kinda known to fall fast & hard for things that need fixing up.

Here’s the BEFORE:

Woodburning Insert Fireplace BEFORE
Okay let’s stop right here, and notice a few things.
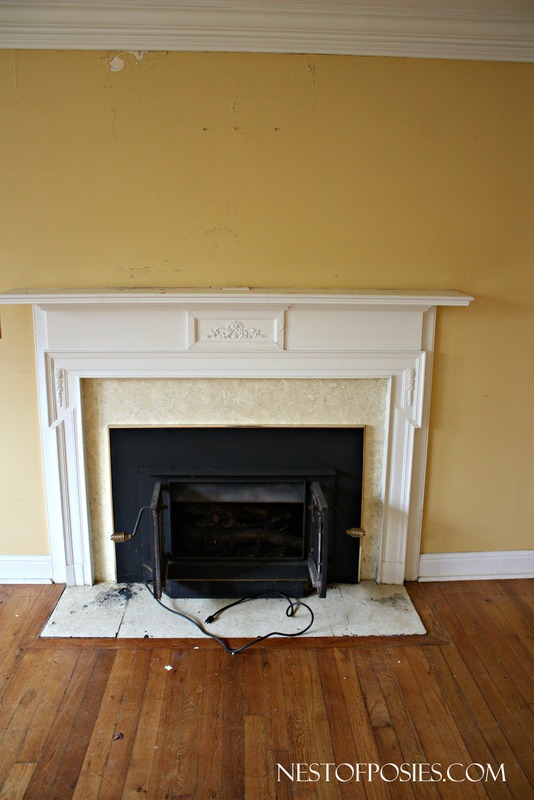
1.  What is that on the hearth part of the fireplace?  Is it cracked tile?  Is it granite?
2.  What is that beigey color going around the fireplace?  Is it marble?  Is it a stone?  I don’t really like it, but I knew we could fix it up.
So….
We started working on this fireplace in September.  And “we” being my painter Teresa & myself.  For the record, I absolutely love our painters.   They have ended up helping us on so many projects that we could not have possibly tackled without their help.   She and her husband are invited to Thanksgiving, if that tells you anything.  😉
Scrapping the hearth of the fireplace
All of these photos were taken with my phone on this day.  Of course I didn’t have my real camera on the day we decided to tackle this!  So she got out her scraper.  And started on the area where there was a large crack.  We had no idea what we were doing or what kind of material was on this fireplace.  All I knew is that I wanted that beigey color gone, and we were going to use the high heat spray paint & spray over the cream/beige color.
Removing the contact paper around the fireplace
We started peeling back this contact like paper with scrappers.  I couldn’t believe how easy it was coming off.  She was working on the left & I was working on the right.  The thing that made it even more amazing is that underneath, was BLACK!!!!  The color I was going to repaint it with.
(Don’t ya like the nice toliet paper rolls on the mantel???  Nice touch, huh?)
Removing the layers of contact paper
It just kept getting better & better.  Don’t you think?  
prepping for high heat spray paint
We got it all peeled off, and then prepared the fireplace area – again for the High Heat spray paint to touch up some areas and also touch up the insert & the brass frame.
And then…it sat there.  We had only put the first coat of white high gloss paint around the mantel.  We never went back to touch it up, because we had so many other things going on.  Plus our floors were going to be refinished & I knew all that dust was going to come.  So we decided to wait for the final coat of white paint until the floors were finished.
Painting a wood burning fireplace insert and mantel
And here she is in all her black & white glory!!!  All fixed up & ready to shine!

Wood Burning Insert Fireplace AFTER.  Using High Heat Spray Paint to spray the insert and the sides of the fireplace

Not bad considering she’s been around since 1945!!!  Right???

Black+Decker would like to see YOUR projects.  No matter how big or how small.

Your BIG Finish
While you’re over there you can enter for their BIG prizes all month long!
This is a sponsored post written by me on behalf of Black+Decker.  All opinions are my own, and I am so grateful they gave me the push to finish  our mantel project!!!
::
::
 
Stay tuned for post #2 coming soon!!!

Filed Under: our home, Uncategorized Tagged With: Black+Decker, Fireplace Makeover, Renovating a Foreclosure, Using high heat spray paint, Your Big Finish

« White Chocolate, Cranberry and Pear Crostata
Holiday Brunch Ideas for Thanksgiving, Christmas and New Years »

Click to see the AFTER of our new sidewalk

Subscribe to Blog via Email

Enter your email address to subscribe to this blog and receive notifications of new posts by email.

Follow on Bloglovin

Follow @NESTOFPOSIES on Instagram

[instagram-feed]
Privacy

Copyright © 2025 · Foodie Theme by Shay Bocks · Built on the Genesis Framework · Powered by WordPress