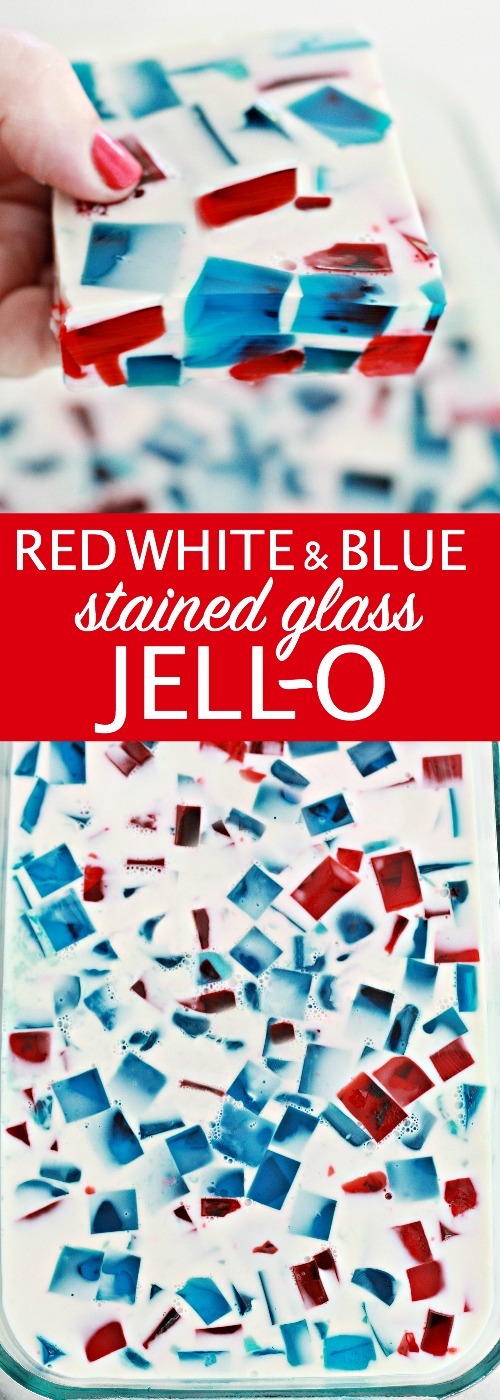
Show your patriotic spirit for the Summer holidays and make this red white and blue stained glass jell-o! It’s cool, refreshing and I believe the obvious part – it’s a show stopper!
And that truly may be the hardest part of the prep work! Finding space in your fridge to store 2 – 9×13 baking dishes or casserole dishes. (Whatever you have on hand.) If you’ve seen my fridge – you understand! 😉 I had all sorts of things stacked on top of each other just to make room in the fridge, but trust me it’s worth it.
Ingredients
- 2 large boxes of Jell-o (in this case red & blue - but you can use any flavor)
- water
- 2 packs of Gelatin
- 1 can Sweetened Condensed Milk
Instructions
- In 2 separate baking dishes or casserole dishes use 1 box of Jell-o per dish and 1 cup of hot water. Stir and dissolve the Jell-o, just like you normally would.
- Store in the fridge overnite.
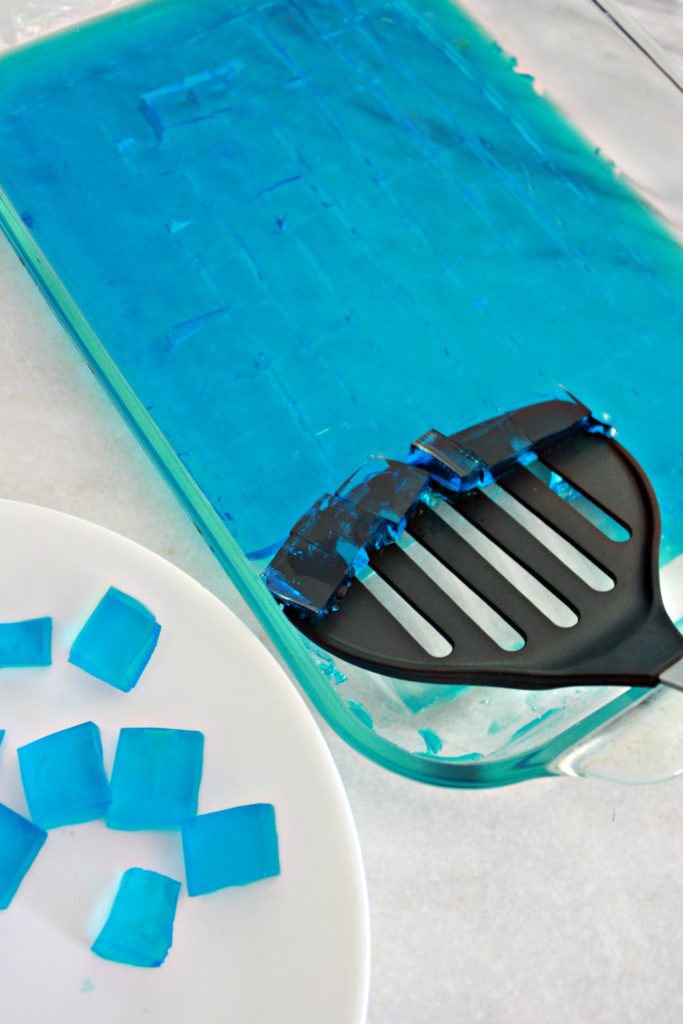
- Cut your Jell-o into small cubes (as shown)
- Place in a 9x13 baking dish. Preferable one that has a lid. Such as a Pyrex.
- Arrange and mix the cubed Jell-o in your dish.
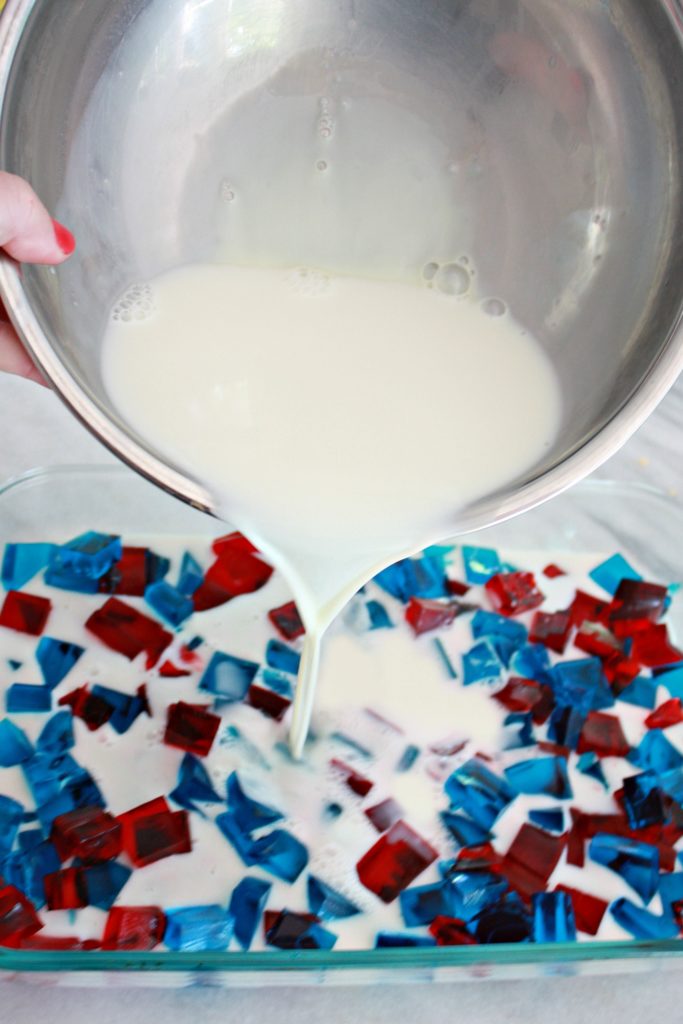
- Using 2 cups of hot boiling water, dissolve the 2 packs of Gelatin in a mixing bowl.
- Stir until Gelatin is dissolved.
- Add your can of Sweetened Condensed Milk.
- Stir and mix well.
- Give your mixture time to cool down. (Room temperature)
- Pour your mixture over the cubed Jell-o.
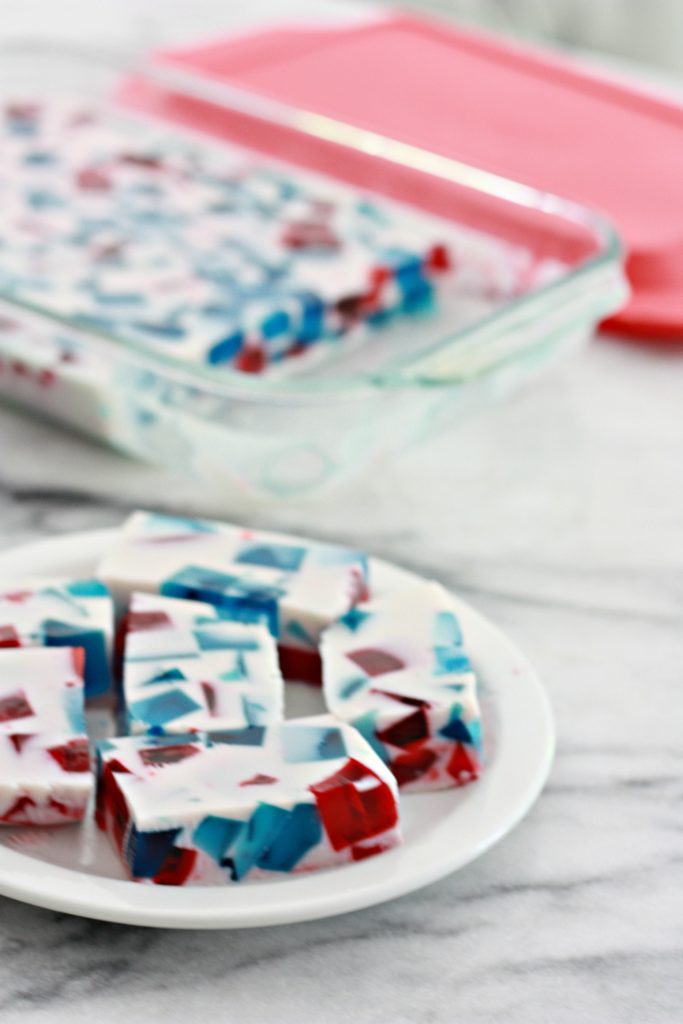
- Place in fridge for at least 7 hours.
- Serve cold & enjoy.
I found that if I used my thinnest spatula (which is my pancake spatula) it picked up the cut Jell-o cubes very easily without tearing them apart. Arrange your Jell-o cubes however you’d like in your baking dish & pour your COOLED mixture over your Jell-o.
What makes this Red White and Blue Stained Glass Jell-o dish so beautiful is the pops of color against the white. I typically forget to wait for my mixture to cool, because I’m always thinking 2 steps ahead. But if you pour it over your Jell-o while it’s still warm your Jell-o will melt.
Now you will have some of your color “bleed” – I think it’s only natural. But that’s what gives it a true stained glass look. This dish really will be the talk of your holiday gathering or neighborhood block party!

My kids love when I make it! They think it’s the coolest thing – ever.

*this post contains affiliate links*